Weather: 54 glorious degrees
What I’m listening to: Say Hey (I Love You), Michael Franti and Spearhead
Not long ago, I discovered that part of my family comes from Amish roots. I was thrilled to no end at this tidbit, and of course, am now drawn to any Amish recipe, eager to try every one and tap into a piece of my heritage (if you have an Amish recipe that you’re fond of, please send it my way). I’d certainly like to think that my Amish ancestors would have been pleased with my from scratch food philosophy. But, enough of genealogy… onto these remarkable caramels.

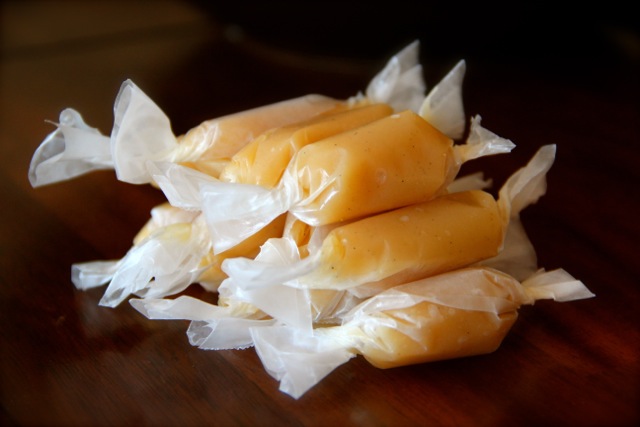
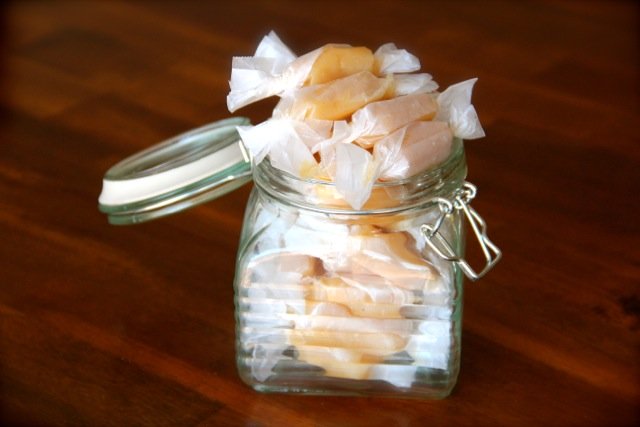
These aren’t the kind of caramels that threaten to yank your teeth out of your mouth. These are melty soft and buttery sweet. The flavor and texture of these handcrafted candies is far superior to any packaged variety.

This was my first time making homemade caramels and I was thrilled with the results – they weren’t half as difficult as I had imagined. Stir, boil, stir, boil, pour, cool, slice, wrap. Honest ingredients and simple steps make this a recipe to which I will be returning again and again.

In case you’re intimidated at the thought of making homemade candies, I’ve included a few extra pictures so you can see how I achieved these little golden morsels. I can’t wait to give these away as gifts.
Vanilla Bean & Sea Salt Amish Caramels
Adapted from [House and Hone|http://houseandhone.blogspot.com/2011/12/hone-made-amish-caramel-yummy-treat.html]
Yields: About 40 caramels
- 1c sugar
- 1c evaporated milk (or cream)
- 3/4c corn syrup
- 1/2c butter + more for buttering the pan
- 1t [vanilla bean paste|http://alaskascratch.wpengine.com/store/]
- sea salt
- wax paper for wrapping
Butter an 8x8 or 9x9 square baking pan. Set aside.
To a dutch oven over medium-high heat, add the sugar, 1/4c of the evaporated milk, corn syrup, and butter. Whisk continually and bring mixture up to a boil.
Stirring with one hand, slowly pour in the remainder of the milk, keeping the mixture at a boil as you add.
Continue stirring and boiling until the mixture reads 235 on a candy thermometer or reaches soft ball stage. *If you do not have a candy thermometer, you can test soft ball stage by dropping a small amount of the caramel into a cup of very cold water. If it forms a soft ball, you're there.
Stir in vanilla bean paste and pour caramel into buttered pan. Set pan on a cooling rack to cool completely. Sprinkle with sea salt.
When cool (you can give them a quick trip to the refrigerator to firm them up and make them easier to work with), cut your caramels into the size you desire by pressing down firmly with a knife. Avoid making a sawing motion, which will deform your caramels and cause the knife to stick.
Cut wax paper into rectangles appropriate to the size of your candies. Pull the caramels from the pan (they will stretch and you can simply reshape them however you like) and place them onto the wax papers. Wrap and repeat.